Twirled Seam Tutorial

I'm often asked how I manage the seams when working with small pieces of fabric like in this quilt that is made entirely of half inch finished squares

I've written up a tutorial showing my process. Here, I'm using larger pieces of fabric but the process is the same no matter the size of the pieces used. 

checkerboard tutorial.jpg

First, you will start with sewn pairs of squares. These can either be cut from strip pieced sections or be made by sewing individual squares together. I typically cut squares and sew them together. I am almost always working with scraps so this makes sense to me. Press the seam allowance to one side. Since we are using only two fabrics, in this first step, press all of the seams to the darker fabric.

Checkerboard 1.jpg

Next, sew these into fourpatch units. When sewing these, make sure that the seams "nest" with each other. Sew the seam with the top seam allowance pointing away from you as shown. The seam allowance on the bottom will be pointing towards you.

checkerboard 2.jpg

You will need to take out the few stitches in the seam allowance and press so that the seams all point in a clockwise configuration as shown below. 

checkerboard 3.jpg

Here are nine four patches arranged as they will be sewn together to make a checkerboard pattern. As you can see, the way the seams have been pressed allow all of the next seam crossings to also nest with each other so that the seam allowances will face in opposite directions. 

checkerboard 4.jpg

When sewing these fourpatches together into pairs, the seams will be oriented opposite to the way they were before. Now, the seam allowances on top will point towards you and the bottom seam allowances will point away from you.

checkerboard 5.jpg

Again, take out the few stitches in the seam allowance and press these seams in a twirl in the counterclockwise direction.

checkerboard 6.jpg

Sew two units as above and then sew them to make a larger fourpatch. Here, you can see that all of the seams will nest.

checkerboard 7.jpg

The seam just shown is going across in the middle of the photo below. The seam twirls alternate direction across the fourpatch.

checkerboard 8.jpg

You can continue making a full size quilt in this manner. Make many of the units as above and then put them together to make even larger fourpatch units. Just keep building larger fourpatch units. Eventually you might have to join smaller sections to get the desired finished block/quilt size. As long as you always start with the seams on the first pair of fabric pieces pointing in the same direction, it will all work out. The direction of the seam twirl on the block will always alternate and no matter how large your quilt, the blocks will aways go together. 

checkerboard 9.jpg

Here is a finished 6 by 6 block on the . 

checkerboard back.jpg

Twirling the seams makes for a flatter finish to your quilt and will make the quilting step much easier! And look how perfectly those nested seams match up.

This is Pat Sloan's Checkerboard block design for The Splendid Sampler.

Splendid Sampler 12 Pat Sloan - Checkerboard.jpg

Merging of Ideas

Last summer I cut a bunch of scraps into 1.5'' squares and started sewing them into fourpatch units. I was aiming for a twin size postage stamp quilt for my grandson's move from the crib to a big bed and worked on it on an off between other projects. 

needlepoint tin.jpg

This winter, I felt compelled to make some sawteeth sections to have just in case I might need them for something. I've often admired sawteeth borders on antique quilts and have added them to a few of my own quilts. Always wanting to keep the scrap bin tamed, sawteeth seemed like just the right thing for some solid scraps.

Here's a view of my design wall at some point this winter. Both projects were hanging out happily with some other works in progress.

design wall.jpg

After making a few strips of sawteeth I went back to working on that postage stamp quilt. The four patches grew into 36 patch units. 

postage stamp.jpg

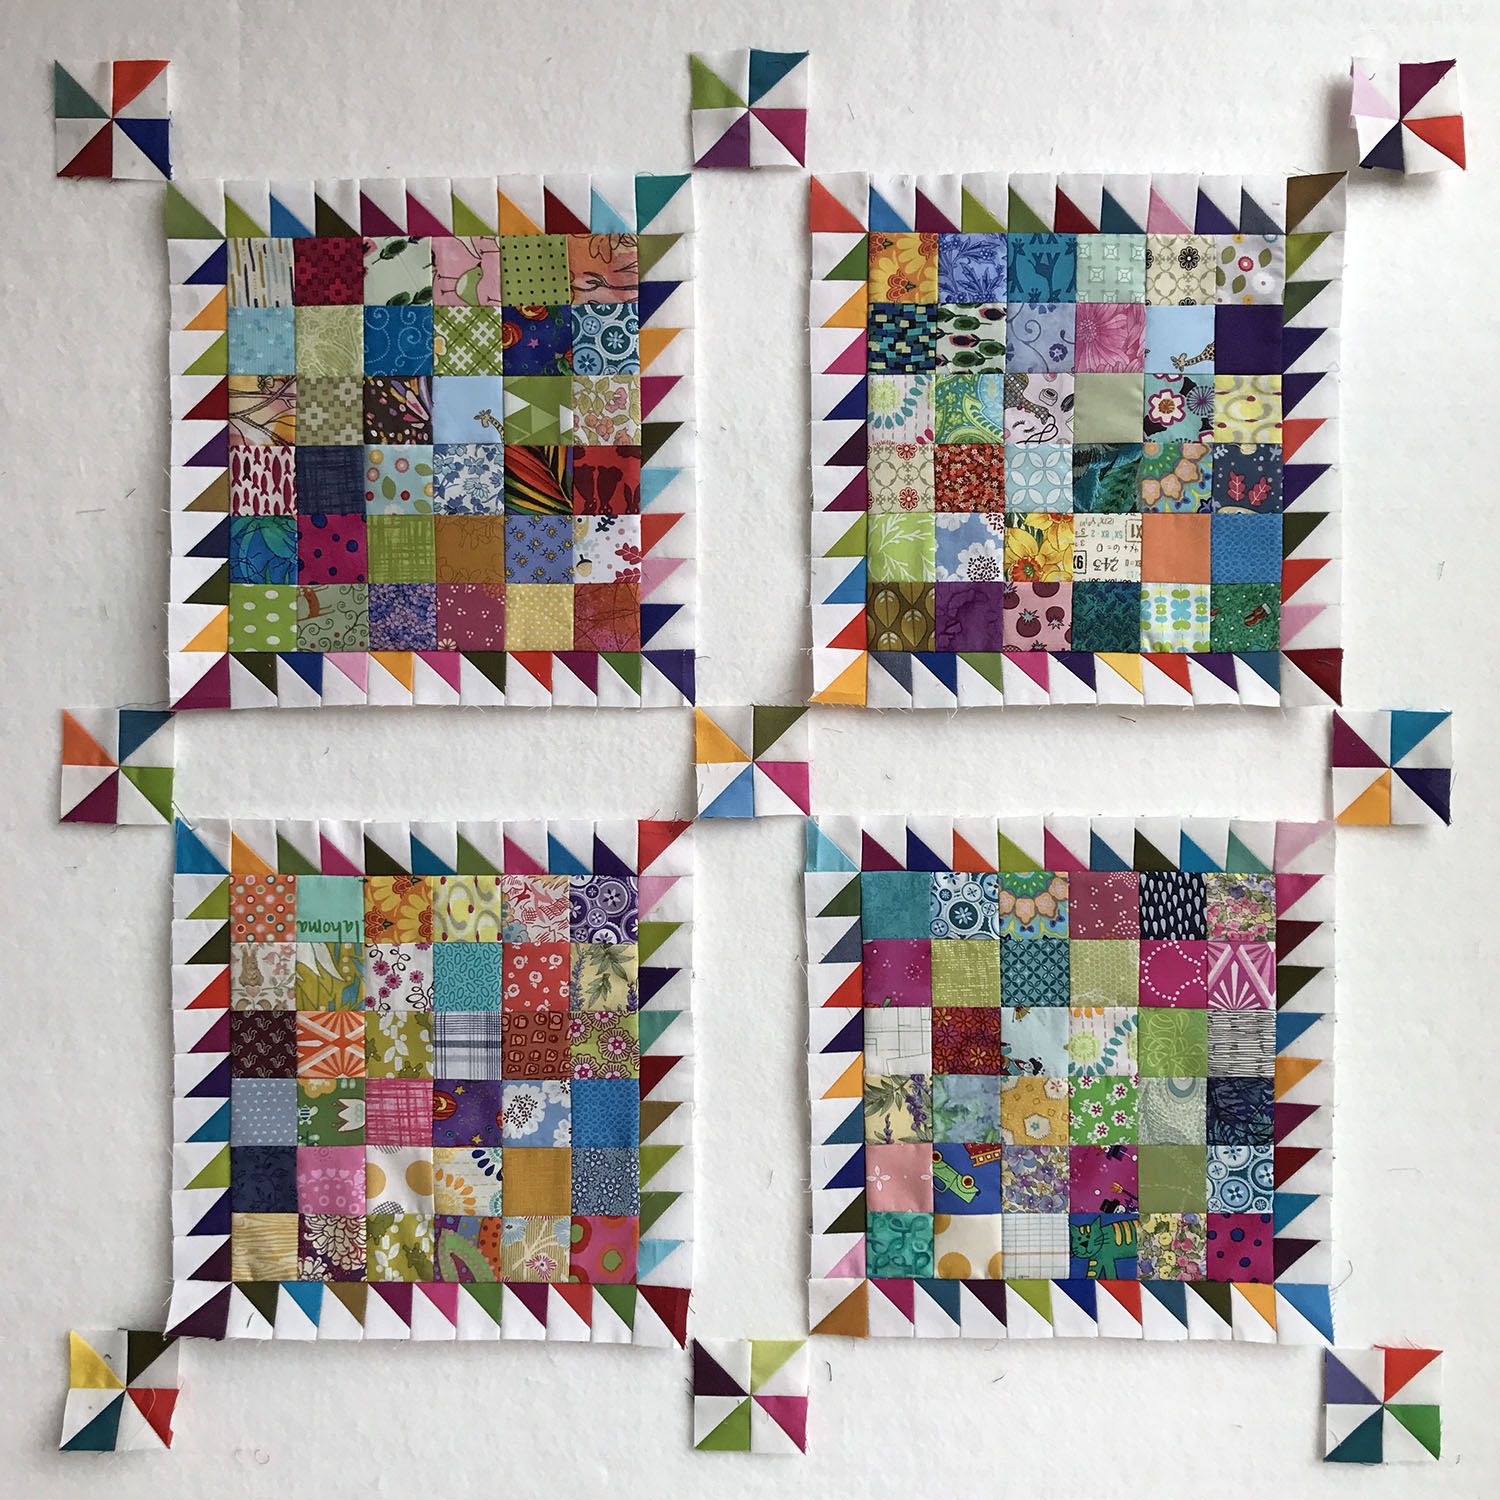
Then it happened. The parts on my design wall started talking to each other. Those blocks were begging to be surrounded by sawteeth. 
postage stamp block.jpg

I added sawteeth to a few more blocks and put them up to admire. 

four corners.jpg

That corner space started talking to me. It wanted a pinwheel.

corner pinwheel.jpg
pinwheels.jpg

I'm now aiming for a 93'' square quilt! I've got all 49 center blocks built but I need to make a lot more sawteeth and pinwheels. I think I'm in love with it. 

postage stamp progress.jpg

I'm glad that I keep several projects going at the same time, and have the parts hanging around in view. If I had put those sawteeth away, this quilt would have continued to progress as a much more boring postage stamp quilt. Granted, my grandson would have gotten that quilt but will probably not be getting this one for his move to a big bed. I'll have to come up with another quilt plan for him.

I love when the quilts tell me what they want to be. 


The Quilt Show

The Quilt Show.jpg

Last month we started off our spring break vacation with a couple of days in Denver. I was there to tape an episode of The Quilt Show with Alex Anderson and Ricky Tims.

The Quilt Show set.jpg

It was a pleasure to work with The Quilt Show team. Miss P went with me the day of  taping and really enjoyed the "behind the scenes" process. She even got to sit in the audience for the recording. 

The Quilt Show audience.jpg

I'll be sure to let you know when it's available for viewing later this year. 

Morning Light

Old School Sewing door.jpg

I love coming to the studio each morning after dropping my daughter off at school. Now that the days are a bit longer and the grey of winter has started to blow away, there is lovely morning light greeting me as I reach the door.  My sewing space/classroom is just through that door you can see on the left in the above photo. 

This is the scene that greets me each morning. As I look at it I see that maybe I should push in the chairs before I leave but that's a small thing, right. They are pulled out and ready for sewing guests!

This space is so much brighter than my home sewing room and it's ALWAYS ready for me. It makes me smile every time I walk in.  I still don't have all of my fabric in the new space but bring more as I need it for the projects I'm working on. 

I am really thrilled to have found the perfect space in town. I love the location, the light, really everything about it. It is an excellent space for both my own sewing work as well as a classroom for the intimate quilting workshops I teach. 

Come sew with me!

crown thread choices.jpg

Here's another mini quilt ready for quilting. The quilt is made of Oakshott cotton and the little squares are 1/2'' finished. 

I'm using invisafil thread by Wonderfil. It's thin and strong and doesn't overpower the small piecing. 

crown of thorns quilting.jpg

I've done the ditch stitching but am still thinking about the rest of the quilting plan.

crown of thorns ditch.jpg

This will be another in my Domestic Abuse Quilt Series

I do seem to flit from project to project but that keeps it interesting for me. Some days I just want to sew without making decisions. Other days I am eager for some precision work. It think I have a project for every mood! 

Gaslight - Domestic Abuse Quilt Series #8

Gaslight, finished size 16'' by 16''

Gaslight.jpg

Gaslighting is defined by Miriam Webster - " to attempt to make (someone) believe that he or she is going insane (as by subjecting that person to a series of experiences that have no rational explanation)" and by the Oxford dictionary - "Manipulate (someone) by psychological means into doubting their own sanity."

Abuse is about power and control and gaslighting is an abuser's way of gaining control over their victim's memories and sanity. The abuser controls what the victim thinks by giving an alternative "truth" that the victim eventually believes.

Gaslight 2.jpg


An abuser can gaslight a victim by questioning their memory of an event (saying something didn't happen that actually did, lying about key facts or details, etc.) or by creating conditions that cause the victim to believe their memory is unstable (cancelling a doctors appointment the victim made, hiding important objects like keys or phones, rearranging a living space or adjusting lighting, etc.). 

The gaslighting techniques are used to try to make the victim doubt their own thoughts, memories and actions. Soon the victim is scared to bring up any topic at all for fear they are "wrong" about it or don't remember the situation correctly.

gaslight 1.jpg

Gaslighting can even beget more gaslighting: an abuser might hide an object or cancel an appointment without the victim's knowledge and then "help" the victim find the misplaced object or sort out the situation while berating them for their poor memory or inability to care for themselves.

From the National Domestic Violence Hotline:  "Gaslighting typically happens very gradually in a relationship; in fact, the abusive partner’s actions may seem harmless at first. Over time, however, these abusive patterns continue and a victim can become confused, anxious, isolated, and depressed, and they can lose all sense of what is actually happening. Then they start relying on the abusive partner more and more to define reality, which creates a very difficult situation to escape."

Domestic Violence knows knows no boundaries when it comes to race/gender/sexuality/age/socioeconomic status/geographic location/culture.  

Remember, it affects ten million in the US every year.  If you or someone you know is experiencing domestic abuse, please know that the folks at the National Domestic Violence Hotline (1 800 799 SAFE or thehotline.org) are ready to listen and support you, as well as refer you to a local program or organization. If you observe someone being abused, you can also call the hotline.  A good samaritan call can save a life!


------


All of the quilts in the Domestic Abuse series so far can be viewed here.


Read more about each quilt:

Isolation

Depression

Numb

Hope

Borderline

PTSD

Broken

A Tisket a Tasket, a Tiny Little Basket

basket block.JPG

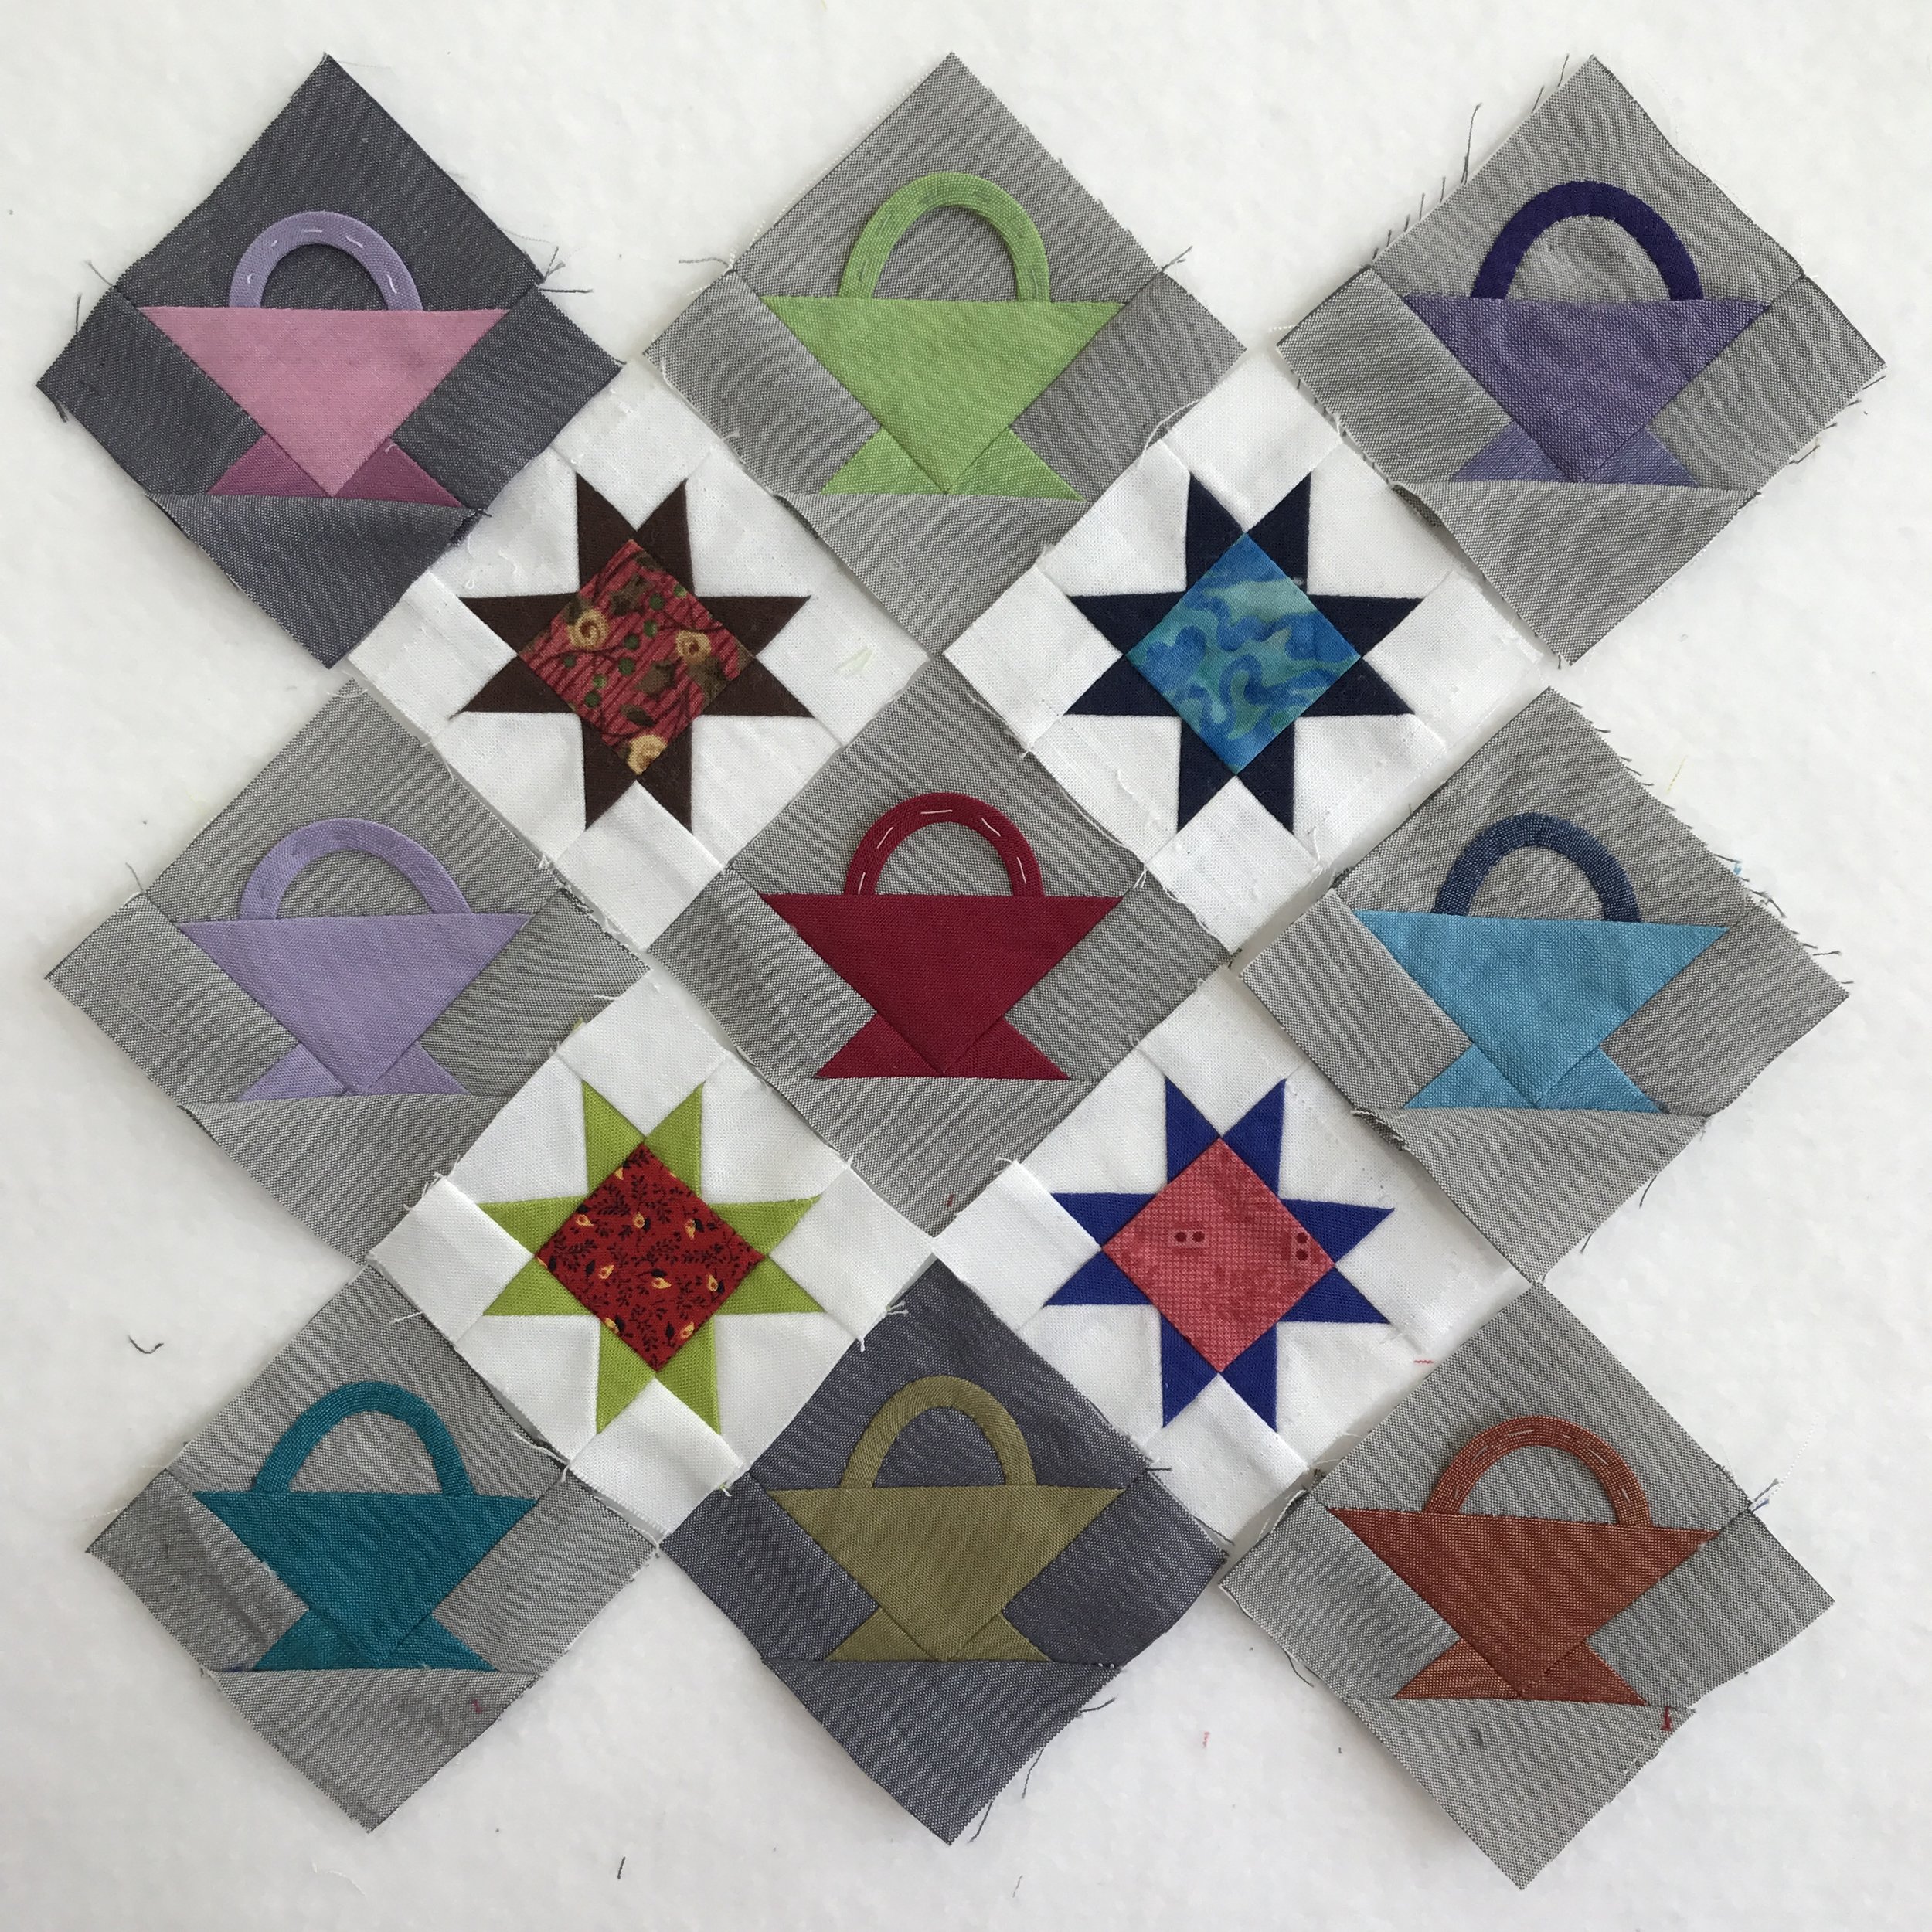
I've tidied in the studio and put a few of my works in progress on the design wall. I like doing that so that I can think about them while I'm working on other projects. Sometimes they speak to me. This week the little baskets I started last September were calling my name.  

I pulled out the Oakshott cotton scraps and started working on them again. 

basket block (2).jpg

The handles are made from a 1/2'' strip of bias. I fold it in thirds and baste down the middle. I tuck the ends of the strip into the seam of the basket top and the background. After the block is finished, I will hand applique the handle down.

baskets and stars together.JPG

These little two inch baskets play nicely with the leftover two inch stars that are also on the design wall.